

analytics filtersfilter internal trafficGA4google analytics
12 Simple Steps To Exclude Internal Traffic From GA4
Stopping internal traffic from being reported in your Universal Analytics account used to be so simple - it’s a little tricker now in GA4. We're here to help - if...


Stopping internal traffic from being reported in your Universal Analytics account used to be so simple – it’s a little tricker now in GA4. We’re here to help – if you follow the 12 steps listed below, you’ll have filtered out your internal traffic in no time!
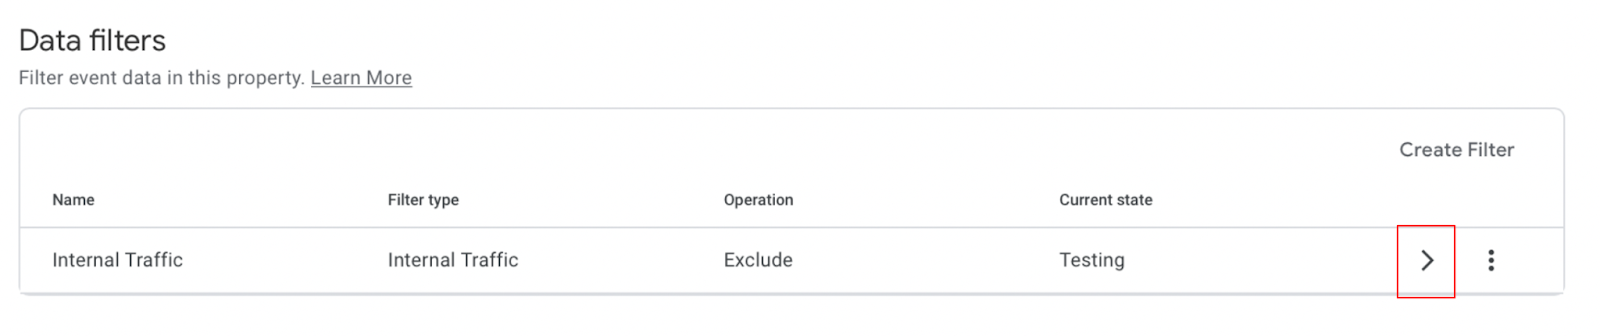
Lots of people will automatically click on ADMIN > DATA SETTINGS > DATA FILTERS and see there’s already a filter for internal traffic set-up. Unfortunately, it isn’t as easy as this! Google Analytics does provide a default filter called ‘Internal Traffic’:
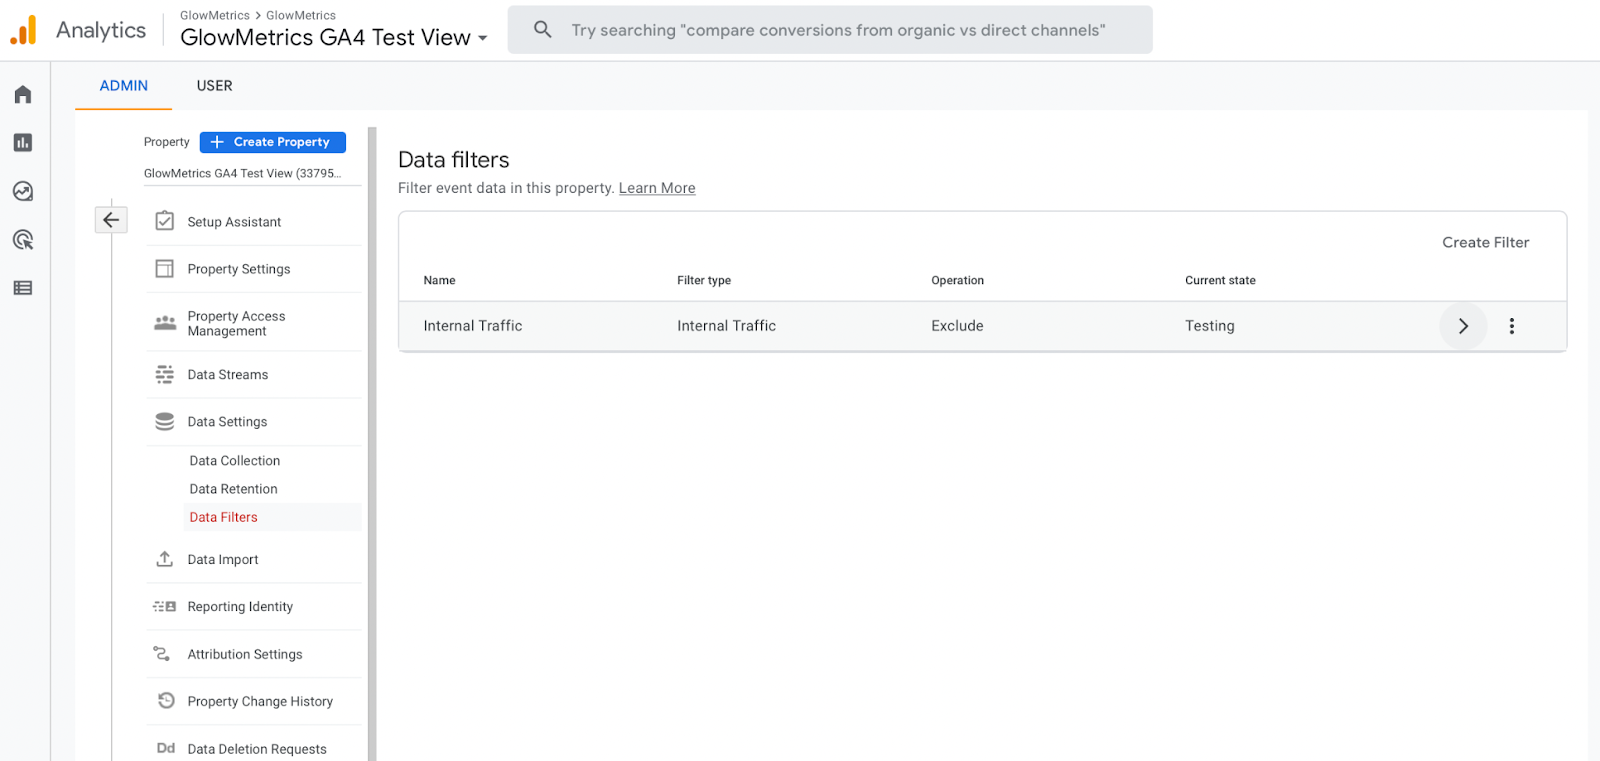
However, you’ll see that the current state is ‘Testing’ and if you click on the arrow, you’ll see there’s nowhere to identify your internal traffic so Google Analytics can filter it out.
We’ll be back to this data filter page later, before that, we’ll need to set up a rule to identify our internal traffic via IPs.
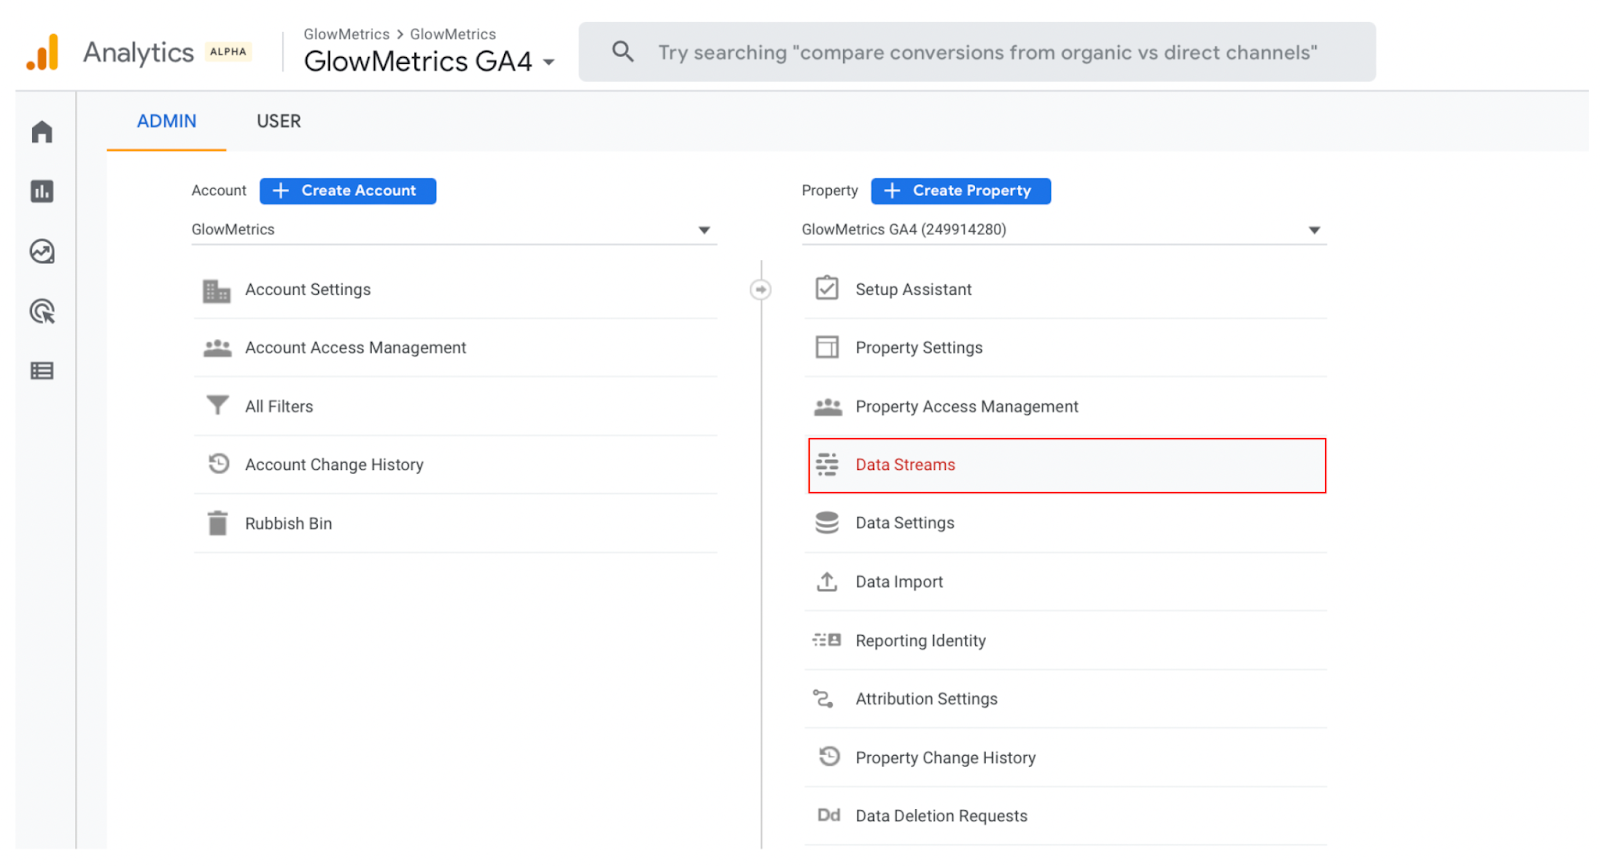
Define IPs to be marked as internal traffic:
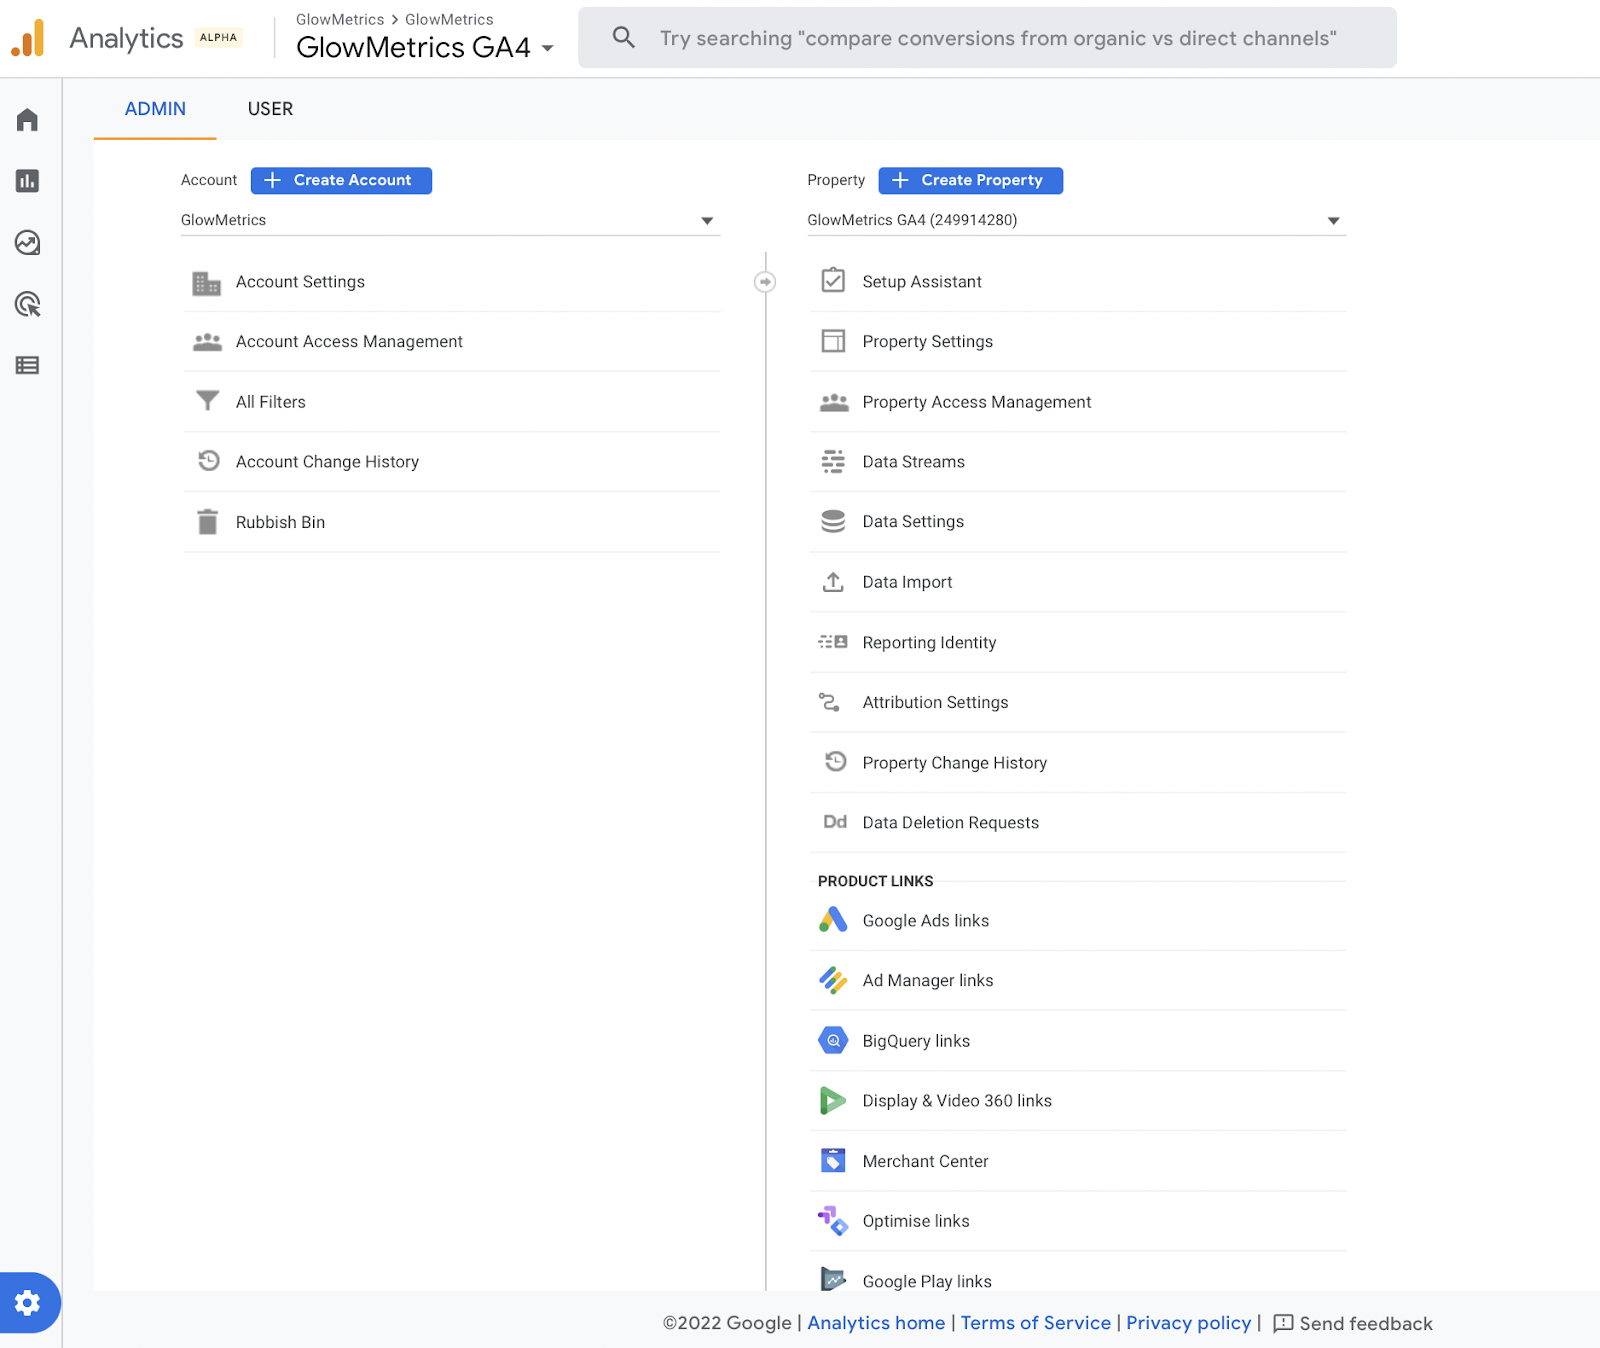
- Click on the gear icon (bottom left of the screen) and under PROPERTY select DATA STREAMS:
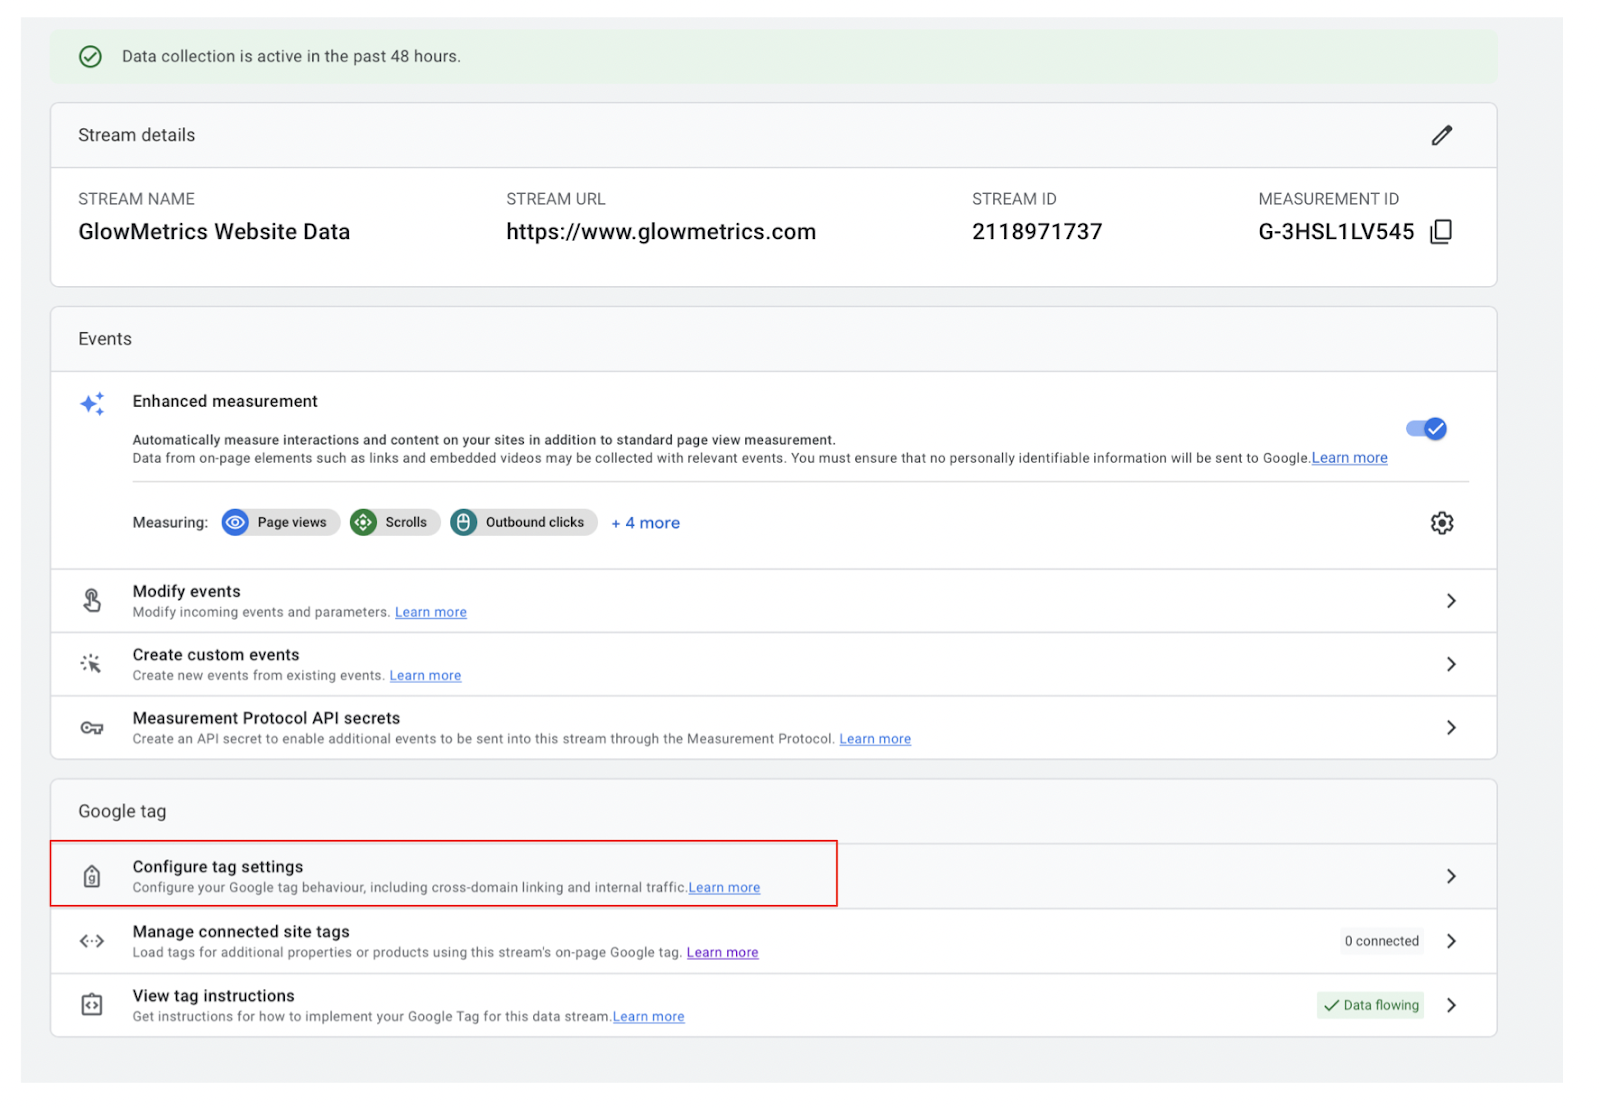
- Select the arrow on the Data Stream to view the configuration settings:

- Under GOOGLE TAG, select CONFIGURE TAG SETTINGS:
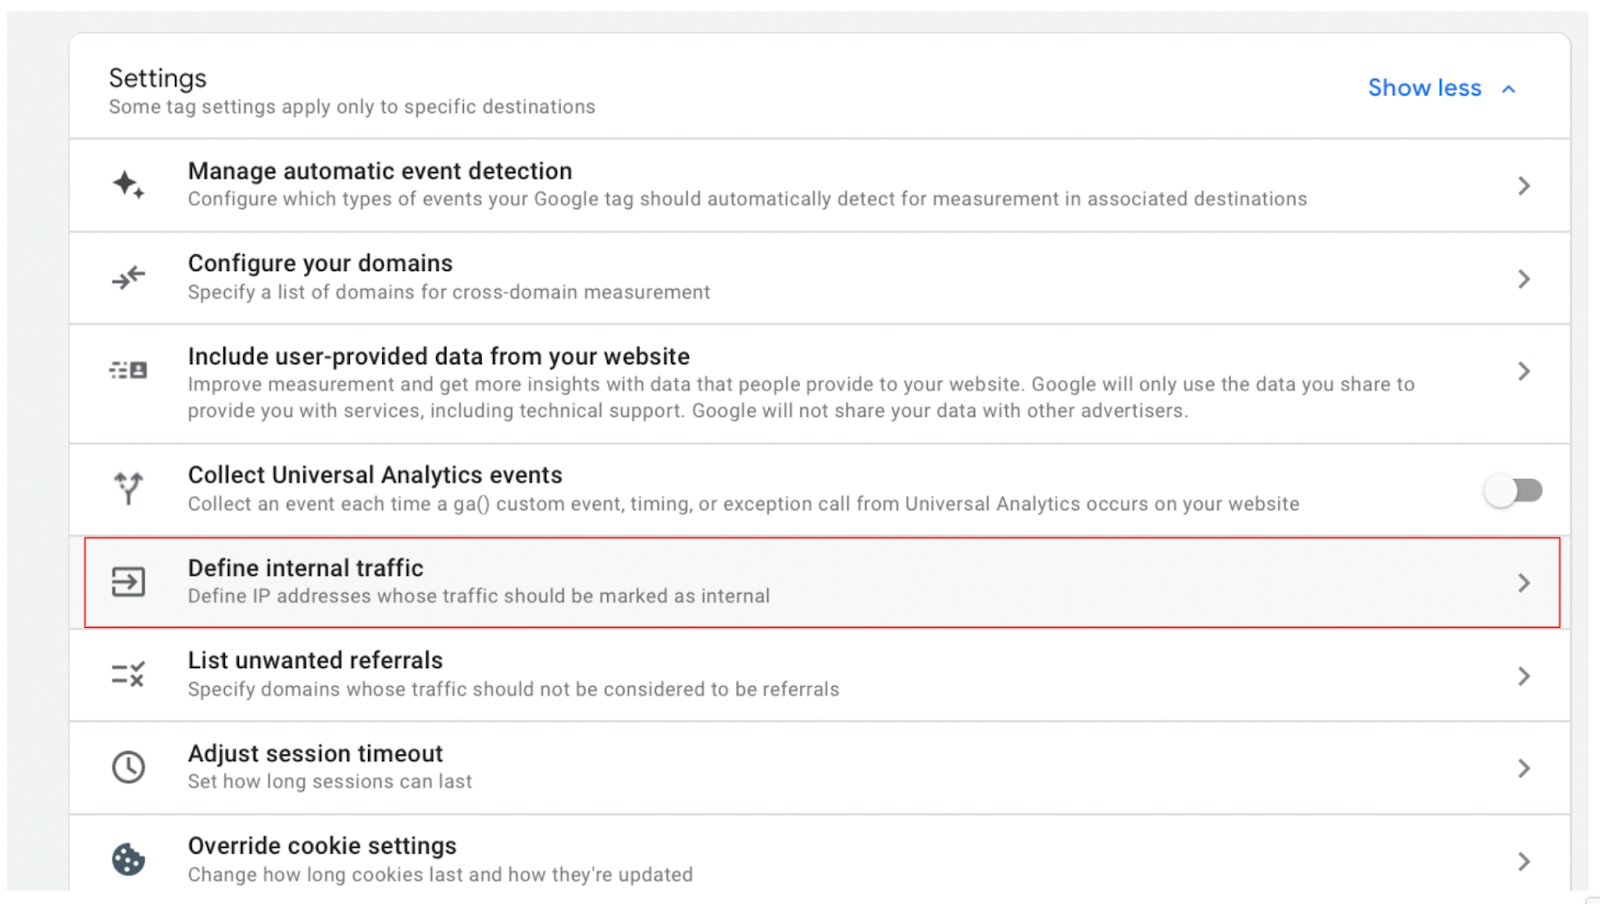
- Under SETTINGS, select to SHOW ALL:
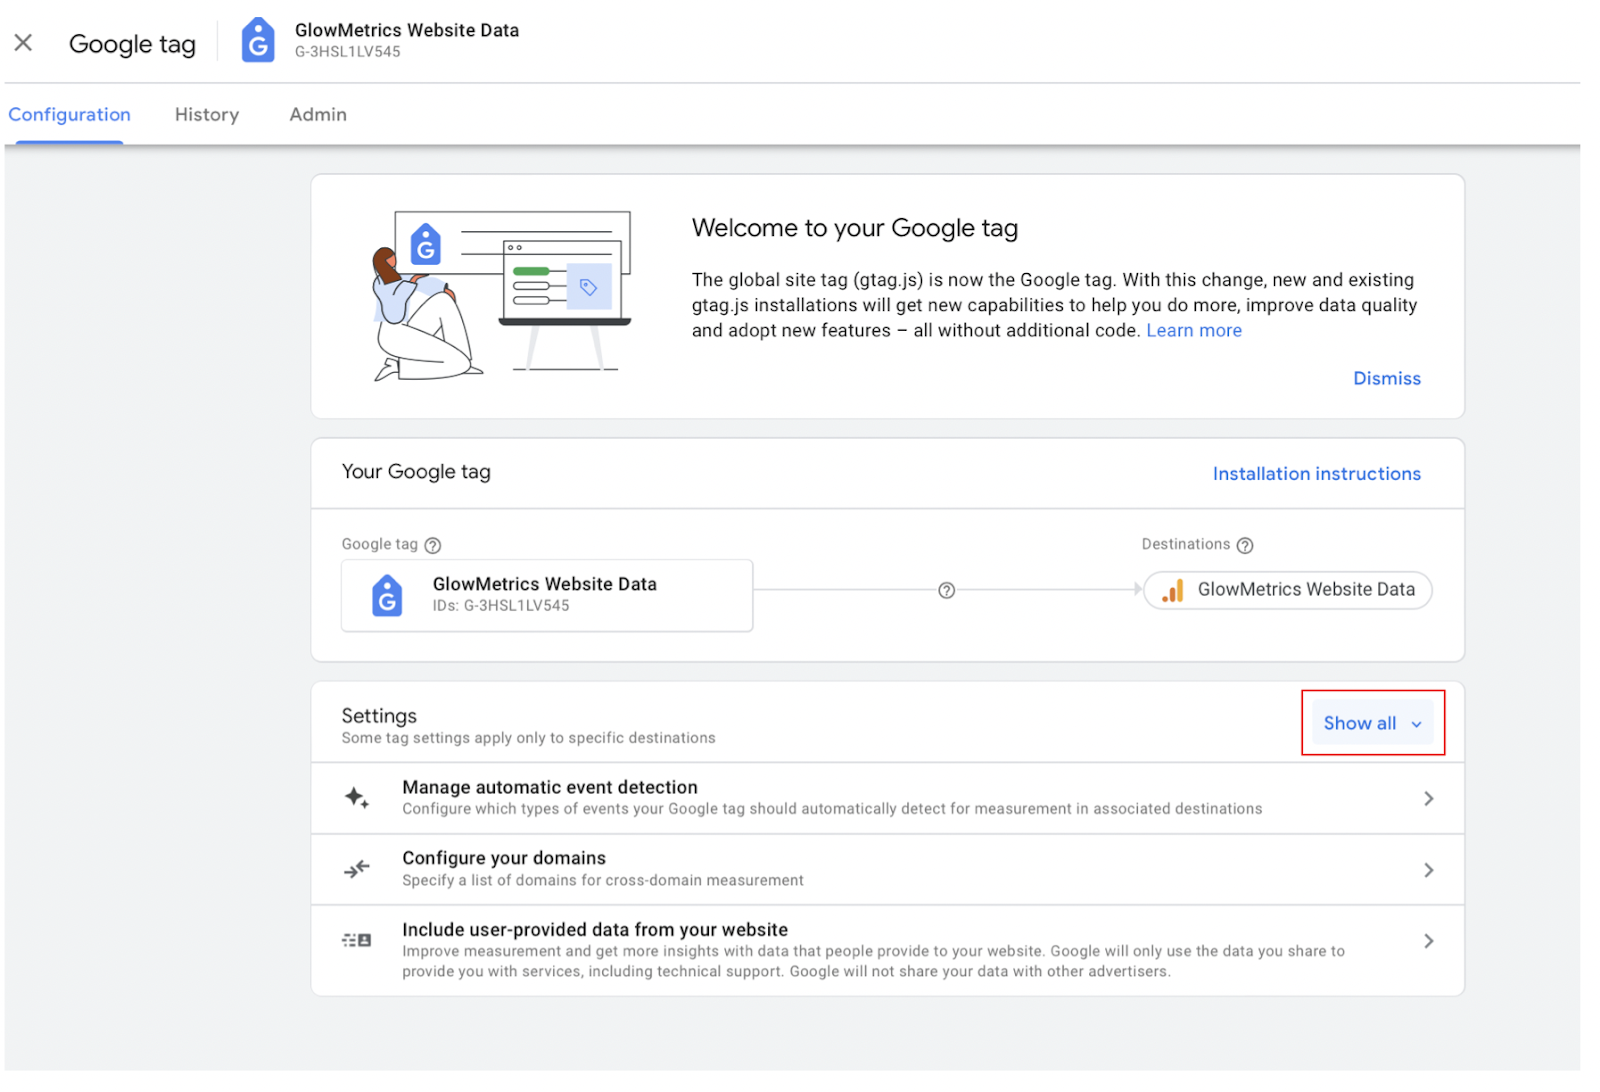
- Then, in the expanded list, select to DEFINE INTERNAL TRAFFIC:
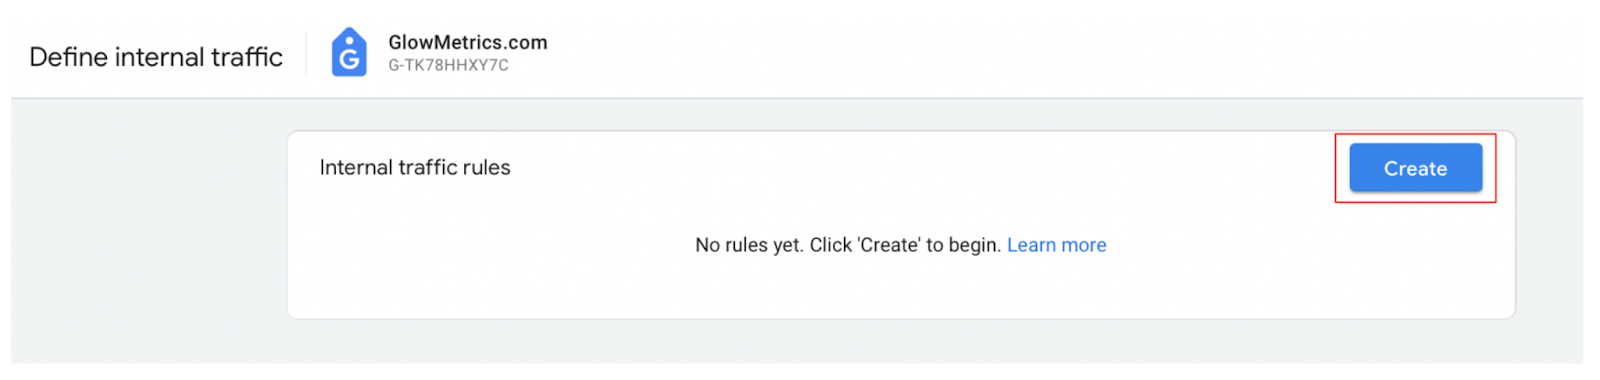
- Choose to CREATE a new rule:
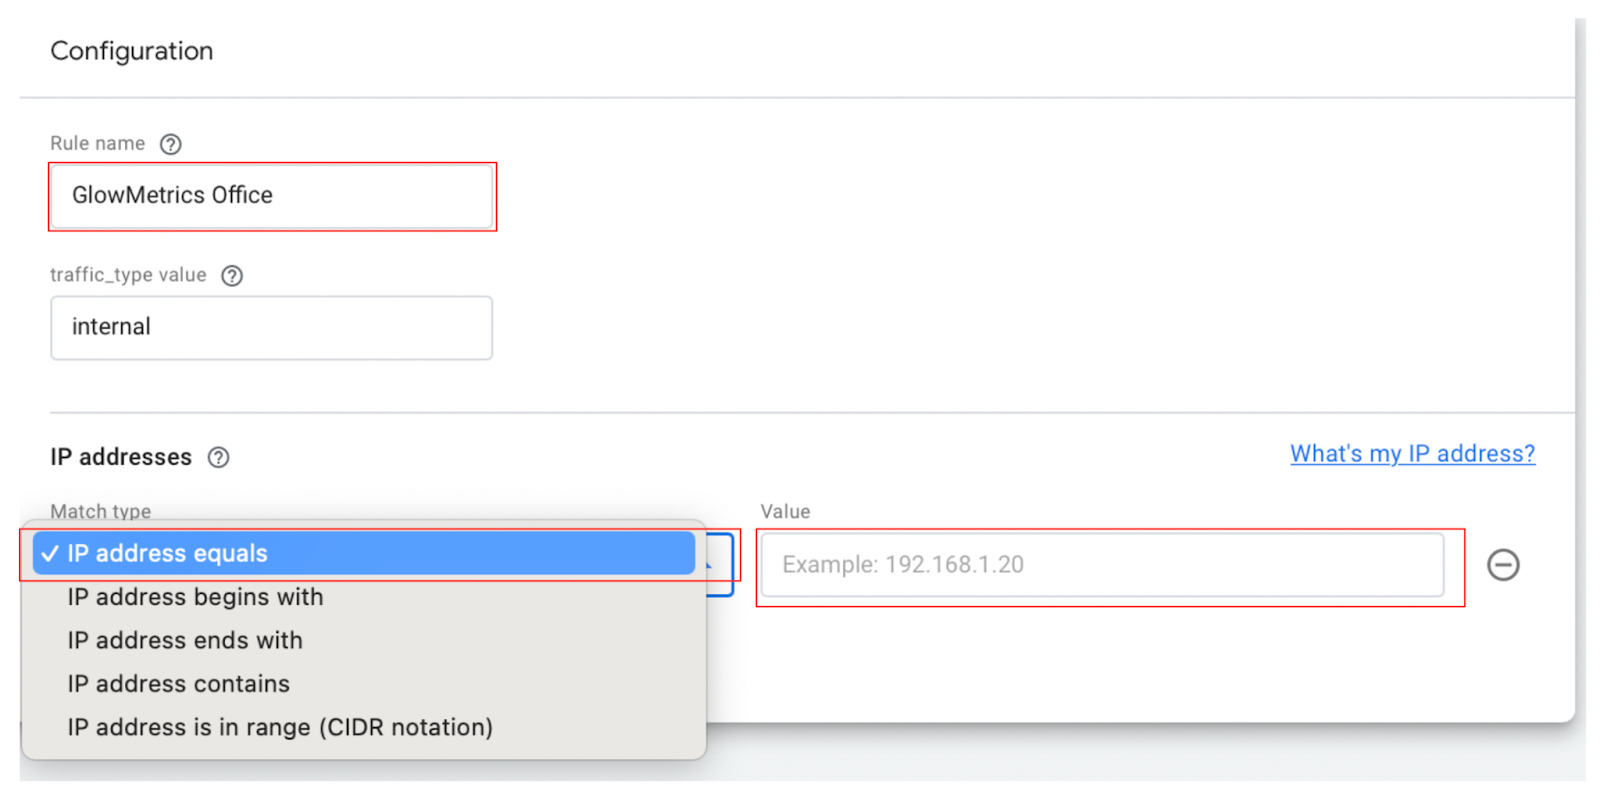
What we are doing here is creating a rule that defines what the value of the traffic_type parameter value is. In this case, the value of the parameter is ‘internal’ and we rule what that is defined by, by listing our office IP address.
Within the configuration:
- Create a rule name- something that describes the individual or group of IPs that you will add.
- Keep the value of the parameter as ‘internal’ as we need this to match the default filter setting (more on that later)
- Add your list of internal IPs. This could be as simple as one IP that equals an IP address or an IP that starts with, ends with or contains a pattern, or one that matches a range of IPs.
Be careful! There’s 4.3 billion IP addresses worldwide so if you use anything outside the option for ‘IP address equals’ – make sure you don’t inadvertently create a rule that matches more IPs that you want!
Once that’s done, save your changes and go back to the main GA4 settings page:
Use Data Filters to filter out internal traffic:
Now that we’ve created a rule for our ‘internal’ value for the event parameter ‘traffic_type’ we have to use this to filter this traffic, from these IPs, out of reports.
- Go back to the account settings page and under PROPERTY settings, in DATA SETTINGS, select DATA FILTERS:

You’ll see that there’s already the pre-defined filter set up by Google Analytics that we mentioned at the start of this article:
Click the arrow to view the configuration of this filter. As long as the parameter value you used in your internal traffic rule matches ‘internal’, it will match the parameter value in the pre-defined filter for internal traffic:
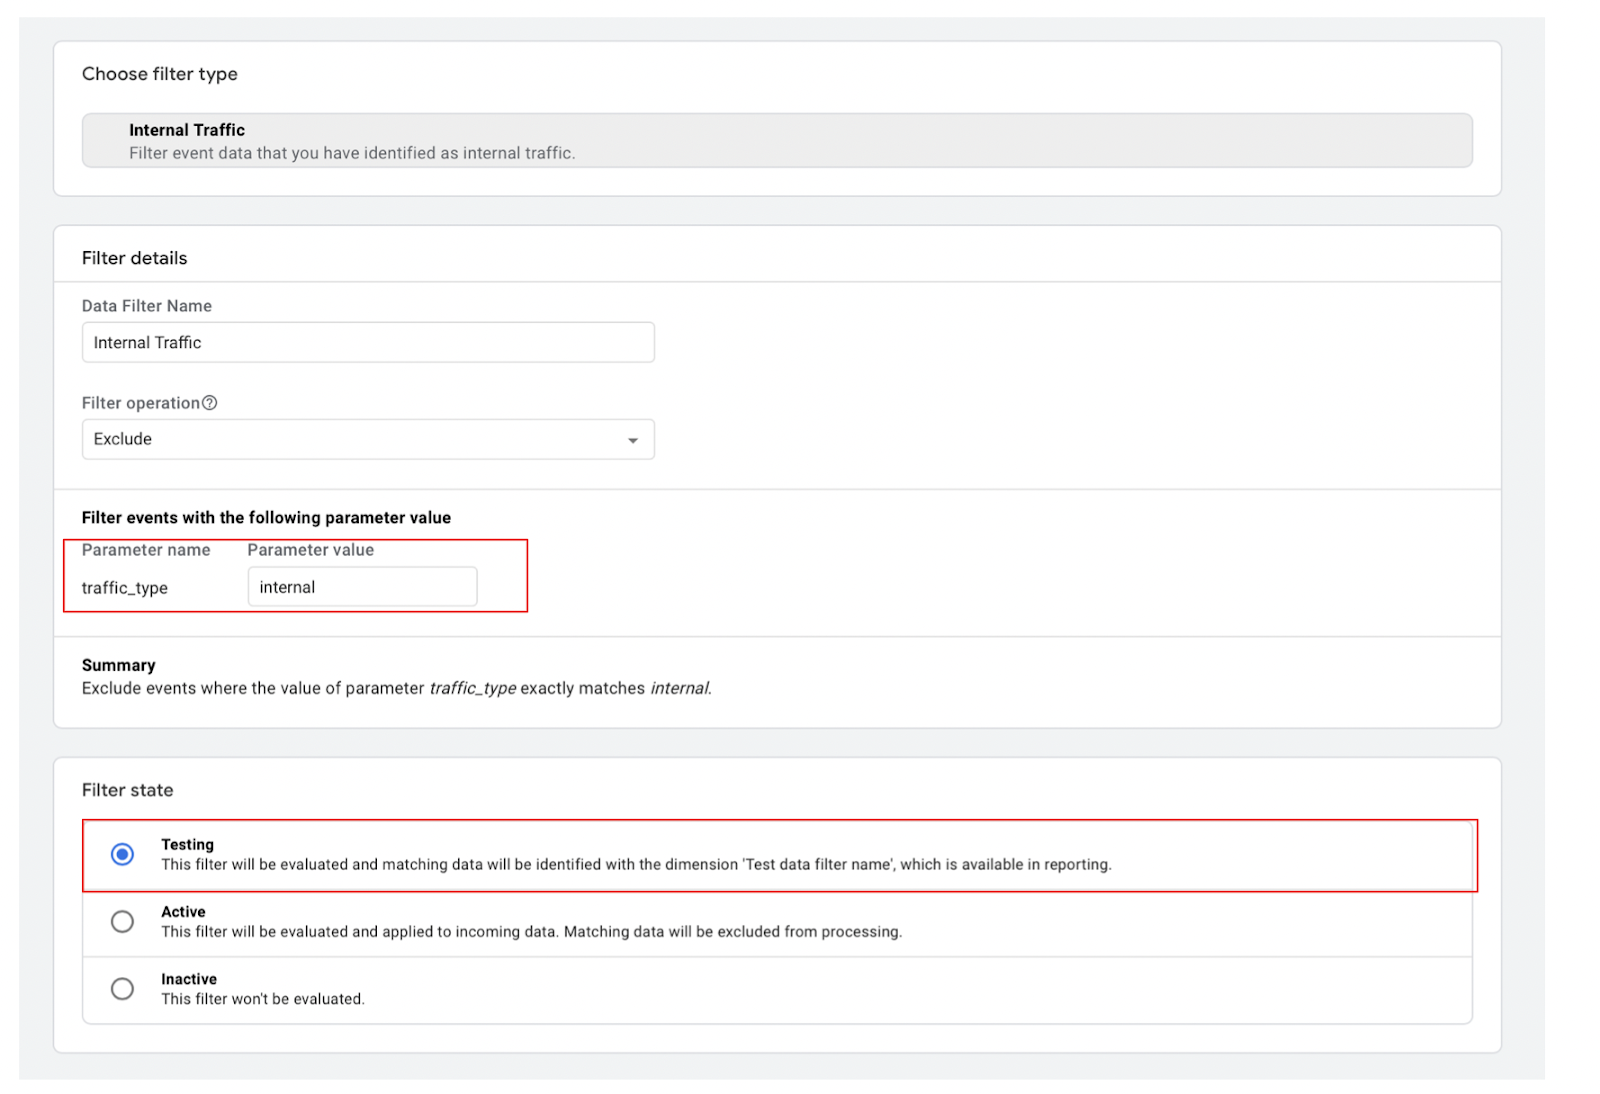
However, you’ll notice that this filter state is in ‘Testing’ mode.
This means that Google Analytics will not use this filter in reports yet, instead, it will send through a dimension in reports called ‘Test data filter name’ – so you can see how much traffic this rule and filter condition meets, before you are confident that you want to ‘Activate’ this filter.
Test Data Filters before activating filter out internal traffic:
*Note that this will only work if you’ve created the rule to define internal traffic (and internal traffic has visited the site within that time range)
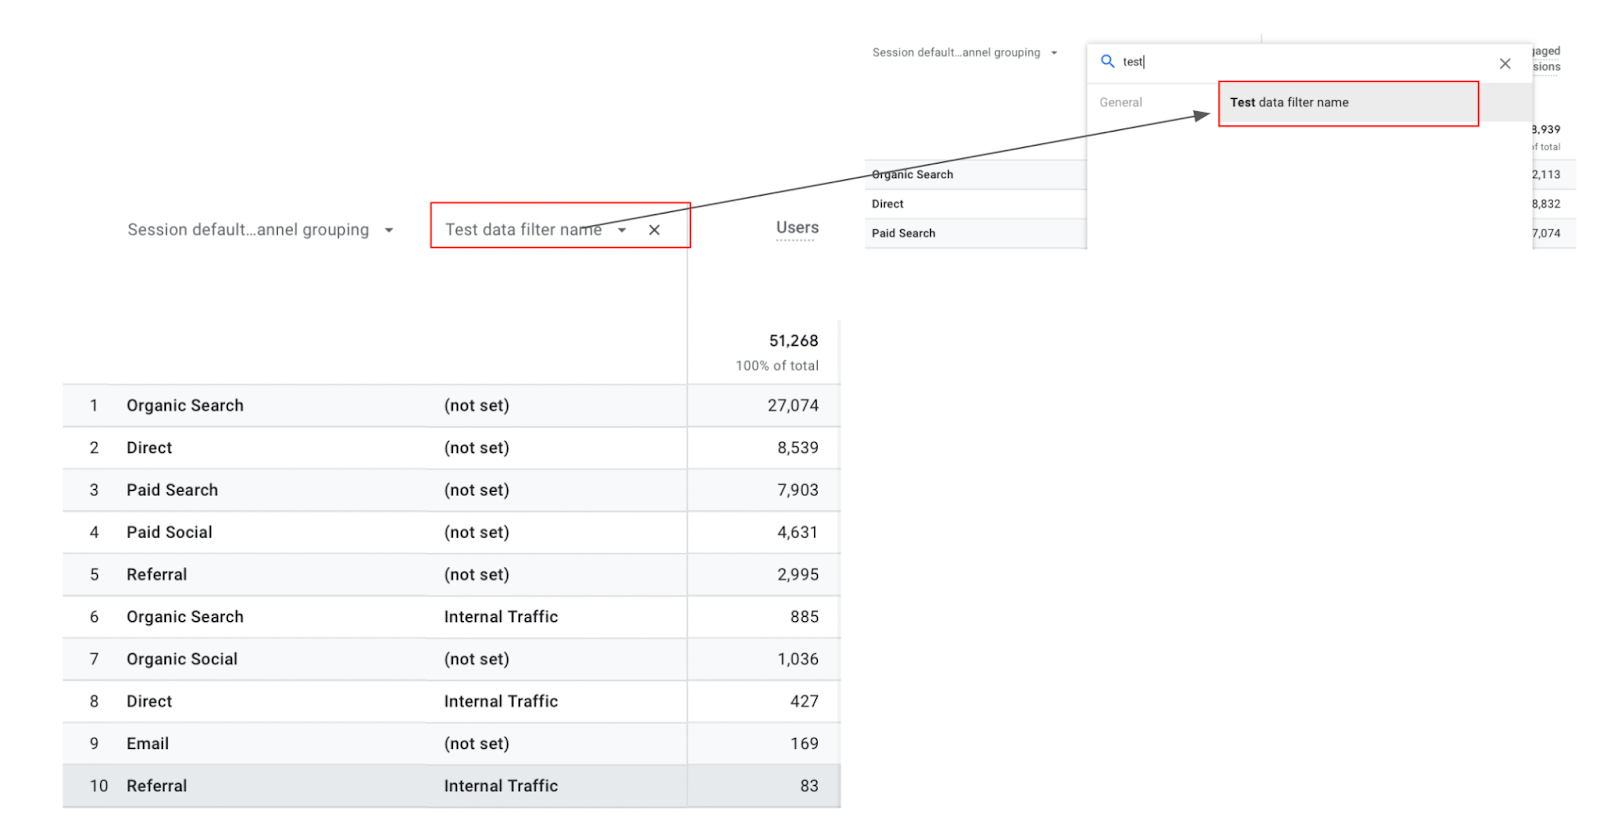
- To expose the dimension in reports, simply add a secondary dimension called ‘TEST DATA FILTER NAME’ and this will show you the split in Internal Traffic vs (not set):
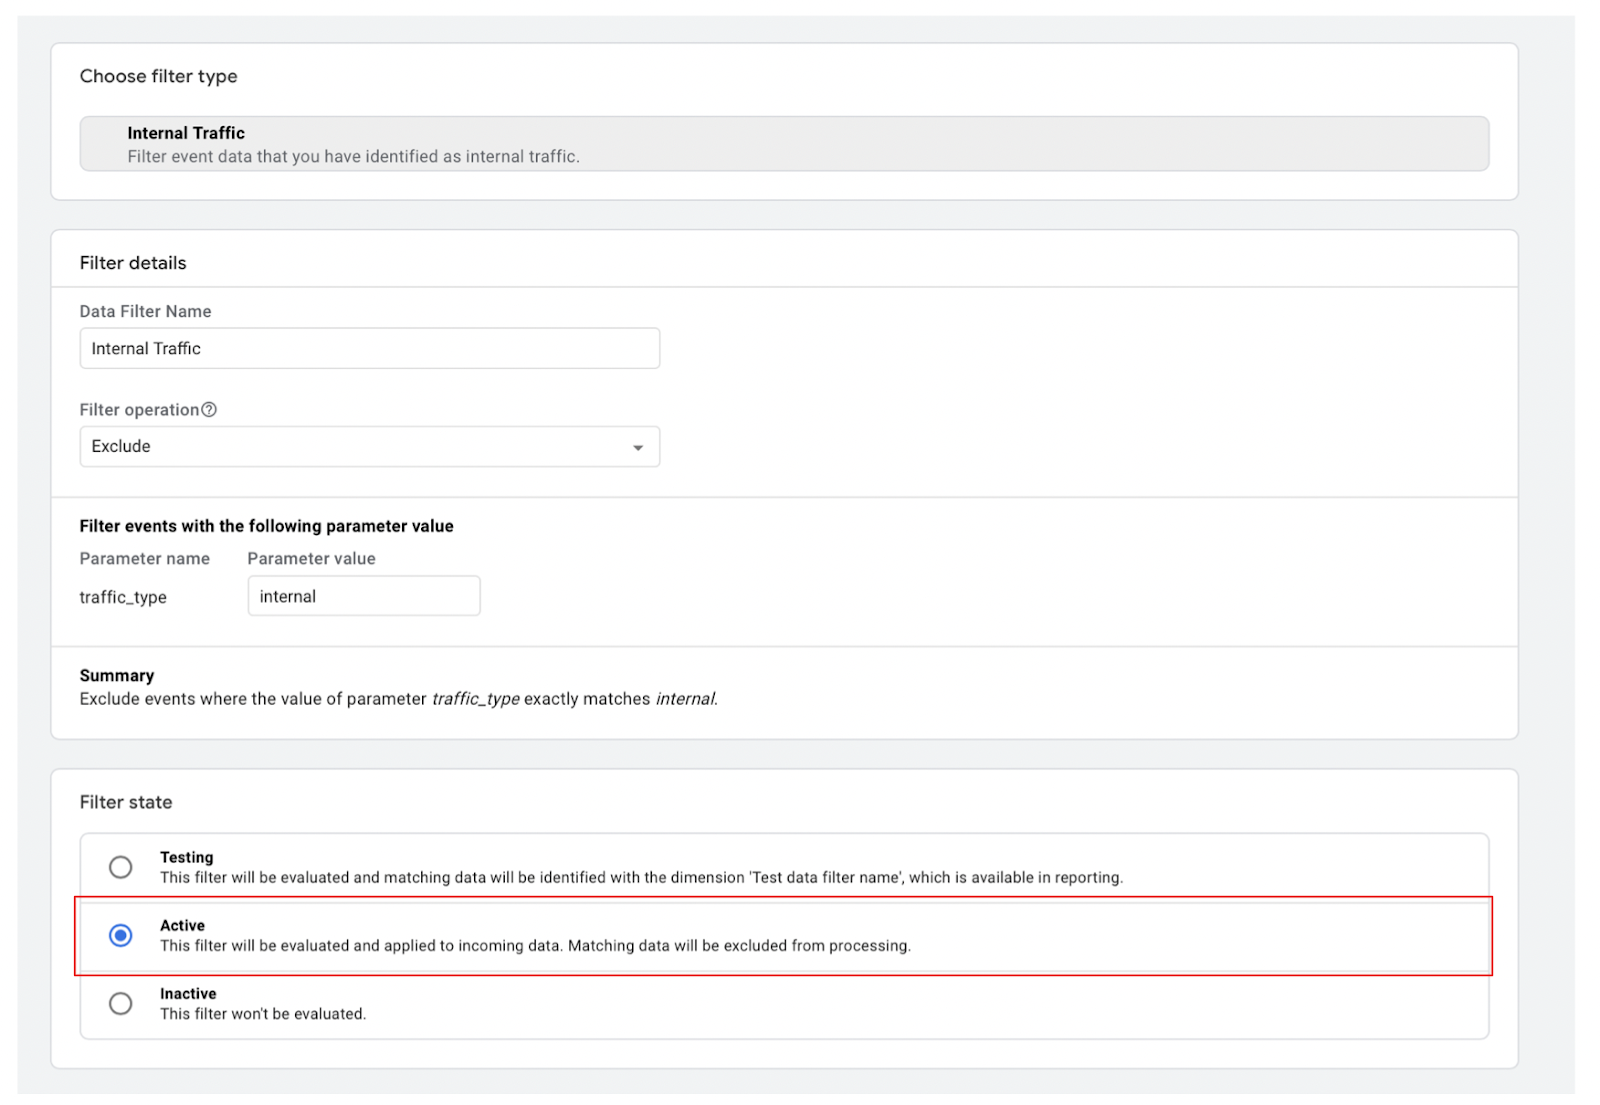
- If this looks correct i.e. is roughly the amount of internal traffic that you’d expect to visit the site, go back to the Data Filter and select to ACTIVATE the filter:
Voilà! You’ve now:
- Created a rule using IPs to define the parameter value ‘internal’ for the parameter name ‘traffic_type’
- Created a filter based on this rule
- Tested the internal traffic filter before activating it.
4 responses to “12 Simple Steps To Exclude Internal Traffic From GA4”
Leave a Reply

Posted by
Joanne Kearney
Joanne has over 10 years’ experience working in digital analytics, executing and managing many large scale projects across the UK and Ireland. Joanne is also an experienced trainer, having developed many customised corporate training schemes and regularly speaks at digital and analytics events.
Read more from Joanne KearneyBrowse by Category
- Social Media
- SEM
- SEO
- Google Ads
Digital Marketing
- Google Analytics
- Google Tag Manager
- Google Opimize
Digital Analytics
Optimise your website and marketing campaign performance with Ireland’s leading digital analytics agency
Sign up to our newsletterEnjoyed reading this article? Find more like it below…

Posted by
Michael Wilson
May 24th 2018
Google Tag Manager
3 min read
Tracking Youtube Videos via GTM in 2018 (Using New Built-In Youtube Trigger)
It used to be a lot more difficult tracking embedded Youtube video plays using Google Tag Manager. You either had to write your own custom script to listen for the...

Posted by
Joanne Kearney
Apr 30th 2021
Digital Analytics Insights
7 min read
Custom Campaign Tagging using UTM codes in Google Analytics (Universal & GA4)
Do you invest your time and money in social campaigns, email campaigns or non-Google display campaigns? Do you stop and think about tagging these campaigns so you can see the...

Posted by
Conor Ross
Jan 14th 2020
Google Data Studio
3 min read
Using Hyperlinks in Google Data Studio
Google Data Studio is absolutely packed with features, and it can take a while to get accustomed to the number of tools at your disposal. There are many features that...
In step 11, what screen are on? How did you get to that page to add dimension? That part seems to be missing.
Hi Sam,
Step 11 uses the Traffic Acquisition table (under the Acquisition reports) to add a secondary dimension to the table for ‘Test Data Filter Name’.
Step 11 will only work if you’ve created the rule to define internal traffic as per the previous steps in the blog (and internal traffic has visited the site within that time range).
Kind Regards,
Joanne
This method of filtering internal traffic by IP addresses might work for a few people in a small team, but for a large organization with hundreds of remote workers, it just isn’t feasible.
I created a better method where users can self-identify as “internal” right on the website itself, which will send a GA4 custom event parameter and even set a cookie for every following visit.
Here’s a step-by-step guide.
https://www.linkedin.com/pulse/filtering-internal-traffic-ga4-self-id-without-ip-addresses-basrak
Thanks for this Bojan- this is a great detailed article!